
Nothing screams summer quite like a bubbling, golden-brown nectarine crisp fresh out of the oven. This dessert is the ultimate way to celebrate stone fruit season with a no-fuss, no-fail recipe that’s simple enough for beginners yet impressive enough for guests. Whether you’re using ripe, juicy nectarines from the farmer’s market or frozen slices from your freezer stash, this crisp comes together in minutes and delivers pure summer flavor in every spoonful.
What Is Nectarine Crisp and Why You’ll Love It
What Makes Nectarine Crisp Unique Compared to Cobbler or Crumble
You’ve probably heard of cobblers, crumbles, and crisps—but what sets a nectarine crisp apart?
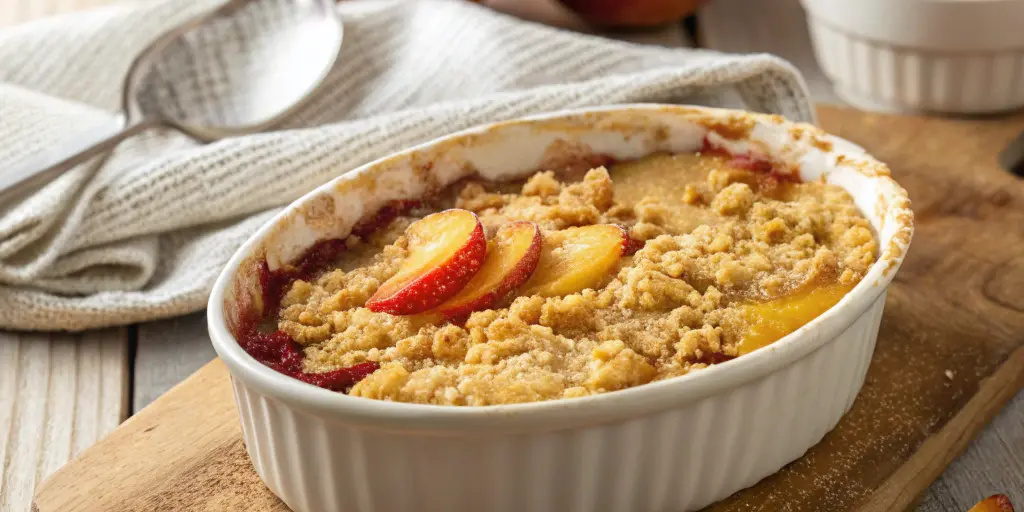
A crisp features a fruity base—usually stone fruit or berries—topped with a crunchy mixture of oats, flour, sugar, and butter. As it bakes, the topping becomes golden and crisp, while the nectarines turn soft and syrupy underneath.
- Crisp vs. Crumble: A crumble usually skips the oats and has a denser, cakier topping.
- Crisp vs. Cobbler: A cobbler has a biscuit or cake-like topping rather than a crunchy one.
Why should you love nectarine crisp? Because it offers:
- A burst of natural sweetness from ripe nectarines
- A buttery oat topping that adds satisfying texture
- Minimal prep time, no fancy equipment needed
- Perfect balance between tart fruit and rich topping
Preparing Nectarines Like a Pro
Do You Need to Peel Nectarines for a Crisp?
One of the most common questions about nectarine crisp is: Do I need to peel the nectarines?
The answer is: Nope, not at all.
Nectarines have smooth, thin skin that becomes tender when baked. Unlike peaches, which often have fuzzy skin that some find unpleasant in desserts, nectarines don’t require peeling unless:
- You’re serving it to someone with texture sensitivity
- You’re aiming for a more elegant presentation (peeling optional)
Leaving the skin on saves time, adds color, and even provides a touch more fiber and nutrients. So unless there’s a specific reason, keep the peel.
How to Slice Nectarines for Even Baking
Even slices = even baking. Here’s how to prepare your nectarines the right way:
- Wash them under cool water and pat dry.
- Halve the nectarine and twist gently to separate.
- Remove the pit using a spoon or your fingers.
- Slice each half into ½-inch wedges for uniform cooking.
For extra precision, use a sharp paring knife. Thinner slices will cook faster but may lose structure; thicker slices retain more bite.
Pro Tip: Toss sliced nectarines with a tablespoon of lemon juice to enhance flavor and reduce browning before baking.
The Perfect Crisp Topping Formula
Ingredients: Oats, Flour, Butter, Brown Sugar
The topping is what makes a nectarine crisp truly shine. It’s the golden, buttery layer that turns crisp and caramelized as it bakes—creating a beautiful contrast to the soft, juicy fruit underneath.
Here’s your go-to formula for the perfect crisp topping:
| Ingredient | Purpose |
|---|---|
| Rolled oats (1 cup) | Adds crunch and texture |
| All-purpose flour (½ cup) | Binds the topping |
| Brown sugar (½ cup) | Sweetness + caramel flavor |
| Unsalted butter (½ cup, cold) | Richness and golden crispness |
| Cinnamon (1 tsp) | Warm depth of flavor |
| Salt (pinch) | Balances sweetness |
Instructions:
- Use cold butter and cut it into cubes.
- Mix dry ingredients in a bowl.
- Cut butter in using a pastry cutter or fork until the mixture resembles coarse crumbs.
- Chill until ready to use.
Optional Add-In: A tablespoon of lemon zest adds brightness that balances the sweet topping.
Adding Crunch: Nuts, Seeds, and Gluten-Free Alternatives
Want to take your nectarine crisp topping up a notch? Try these mix-ins:
Crunchy Upgrades
- Chopped pecans, walnuts, or almonds (¼ cup) – for nutty flavor
- Sunflower or pumpkin seeds – nut-free and toasty
Gluten-Free Options
Replace flour with:
- Almond flour
- Oat flour
- Gluten-free baking blend
Use certified gluten-free oats to ensure it’s safe for those with celiac disease or sensitivity.
Healthier Tweaks
- Swap butter for coconut oil or vegan butter
- Use maple syrup or coconut sugar instead of brown sugar
- Add chia seeds for a nutrition boost
Keep in mind: The topping should crisp up, not get soggy. Balance your moisture carefully, especially with alternative ingredients.
Step-by-Step Nectarine Crisp Recipe
Ingredients and Substitutions (Including Vegan Options)
Here’s your complete ingredient list for the ultimate nectarine crisp. This recipe serves 6–8 and fits into a standard 9×9-inch baking dish.
For the Filling:
- 6 ripe nectarines (sliced, about 5–6 cups)
- 2 tablespoons lemon juice
- ¼ cup granulated sugar
- 1 tablespoon cornstarch (or flour)
- 1 teaspoon vanilla extract
- ½ teaspoon cinnamon
For the Crisp Topping:
- 1 cup rolled oats
- ½ cup all-purpose flour (or oat flour for gluten-free)
- ½ cup brown sugar
- ½ cup unsalted cold butter (or vegan butter)
- ¼ teaspoon salt
- ½ teaspoon ground cinnamon
Substitutions:
| Ingredient | Substitute |
|---|---|
| Granulated sugar | Maple syrup, coconut sugar |
| Butter | Vegan butter, coconut oil |
| Cornstarch | Arrowroot powder or flour |
| All-purpose flour | Almond flour or oat flour |
This makes the recipe flexible for gluten-free, vegan, or refined sugar-free diets.
Instructions: Mixing, Layering, and Baking Perfectly
Follow this step-by-step process to achieve a perfectly golden, bubbling nectarine crisp every time:
- Preheat your oven to 350°F (175°C).
- Grease your 9×9-inch baking dish lightly with butter or non-stick spray.
- Prepare the filling: In a large bowl, toss sliced nectarines with lemon juice, sugar, vanilla, cinnamon, and cornstarch. Mix until evenly coated.
- Transfer the fruit mixture into the baking dish and spread evenly.
- Make the topping: In another bowl, combine oats, flour, sugar, salt, and cinnamon. Cut in the butter until crumbly.
- Sprinkle the topping over the nectarines, covering them evenly.
- Bake for 35–40 minutes, or until the top is golden and the filling is bubbly around the edges.
- Cool for 10–15 minutes before serving. It will thicken as it sits.
Pro Tip: If your topping is browning too fast, loosely tent foil over it halfway through baking.
This crisp is delicious warm, room temperature, or even chilled. Want to upgrade it? Top with vanilla bean ice cream or fresh whipped cream for the full experience.
Common Mistakes to Avoid When Making Nectarine Crisp
Even the simplest desserts have their pitfalls—and nectarine crisp is no exception. Here are the most common mistakes that can sabotage your crisp and how to avoid them.
Overbaking or Underbaking Crisp
Timing is everything. Overbaking dries out the fruit and burns the topping. Underbaking leaves the oats chewy and the filling runny.
Tips to nail the bake:
- Start checking around minute 35—look for bubbling fruit edges and a deep golden topping.
- Use a fork to check the softness of the fruit—if it gives easily, it’s done.
- Let it cool before slicing. The crisp will continue to thicken as it sits.
If your oven runs hot, rotate the dish halfway through. If it runs cool, extend the bake by 5–7 minutes.
Using Underripe Fruit or Incorrect Pan Sizes
Using hard, underripe nectarines results in a bland, overly firm filling. Remember: baking doesn’t magically ripen fruit. If your nectarines aren’t sweet or juicy when raw, they won’t improve in the oven.
Here’s how to avoid this:
- Only use fragrant, slightly soft nectarines (see Part 2 for picking tips).
- If your fruit is underripe, add a tablespoon of honey or sugar to the filling.
- Always use the correct pan size—too small and it’ll overflow; too large and it’ll dry out.
Pro Tip: Don’t pack the fruit too tightly—leave a little space to allow bubbling.
Serving Suggestions and Pairings
Once your nectarine crisp is baked and bubbling, the only thing left to do is serve it up right. Whether you’re planning a casual dessert or a dressed-up dinner party, the way you serve it can make all the difference.
Best Ways to Serve Nectarine Crisp (Ice Cream, Whipped Cream, etc.)
A warm spoonful of crisp on its own is heavenly—but pairing it with a creamy topping elevates the experience.
Classic Pairings:
- Vanilla Ice Cream – The ultimate combo. Melts into the crisp, adds rich creaminess.
- Whipped Cream – Light and fluffy, balancing the warm, syrupy fruit.
- Crème Fraîche or Greek Yogurt – Adds a tangy twist for contrast.
Serve immediately after baking, or reheat slightly and then top for that fresh-from-the-oven vibe.
How to Turn It into a Fancy Brunch or Dessert Platter
Nectarine crisp isn’t just for after dinner—it’s brunch-perfect, too.
Brunch Ideas:
- Serve in individual ramekins for an elegant presentation.
- Add a side of fruit salad and breakfast sausage or quiche.
- Drizzle with honey and top with granola for a breakfast-crisp combo.
Dessert Platter Upgrade:
- Offer toppings like ice cream, whipped coconut cream, chopped nuts, and berries.
- Serve alongside a dessert wine like Moscato or Riesling.
Looking for inspiration? Try our Sweet Potato Puffs for a fun snack idea to pair with brunch.
FAQs About Nectarine Crisp
Do You Need to Peel Nectarines for a Crisp?
No, you don’t need to peel nectarines. Their smooth skin becomes tender during baking and adds beautiful color and texture. Plus, it saves time and retains nutrients. Only peel if you’re aiming for a smoother texture or elegant presentation.
Can I Make This Ahead of Time?
Yes, nectarine crisp is make-ahead friendly. You can prep it a day before and bake it fresh, or bake it in advance and reheat when needed. It stores well in the fridge for up to 4 days and can be frozen for up to 3 months either before or after baking.
How Ripe Should the Nectarines Be?
Choose nectarines that are slightly soft to the touch and smell sweet at the stem. Underripe nectarines won’t release enough juice or flavor, while overripe ones can turn mushy. Ripe but firm nectarines offer the best texture and taste balance for baking.