
Looking for a gruesome but delicious treat that will be the talk of your Halloween party? These gooey Marshmallow Rice Bubbles Halloween Brains are surprisingly easy to make and disgustingly fun to eat! With their realistic brain-like texture and blood-red color, they’re guaranteed to make your guests do a double-take before diving in for seconds.
Why You’ll Love This Recipe
- No-Bake & Super Easy: Perfect for all skill levels – no oven required!
- Only 4 Simple Ingredients: Budget-friendly and accessible items you probably already have
- Perfectly Spooky: The ultimate centerpiece for any Halloween table
- Kid-Friendly Fun: A great recipe to make with the little ones (they love the gooey mess!)
- Make-Ahead Friendly: Prepare up to 3 days in advance for stress-free party planning
Ingredients You’ll Need
Main Ingredients
- 6 cups Rice Bubbles (or Rice Krispies) – Both names work perfectly for this Halloween rice bubble recipe! Fresh cereal gives the best crunch.
- 4 cups mini marshmallows – Use fresh marshmallows for the best gooey texture. Older marshmallows can be dry and won’t melt as smoothly.
- 3 tablespoons unsalted butter – Unsalted butter lets you control the flavor and prevents the treats from becoming too salty.
- Red gel food coloring – Pro-Tip: Use gel-based food coloring instead of liquid. It provides a vibrant red without adding extra liquid to the mixture, keeping your brains perfectly textured.
Optional Extras
- Corn syrup (for realistic “blood” drizzle)
- Vanilla extract (1/2 teaspoon for flavor boost)
Equipment
Essential Tools
- Large microwave-safe bowl or heavy-bottomed saucepan
- Wooden spoon or silicone spatula
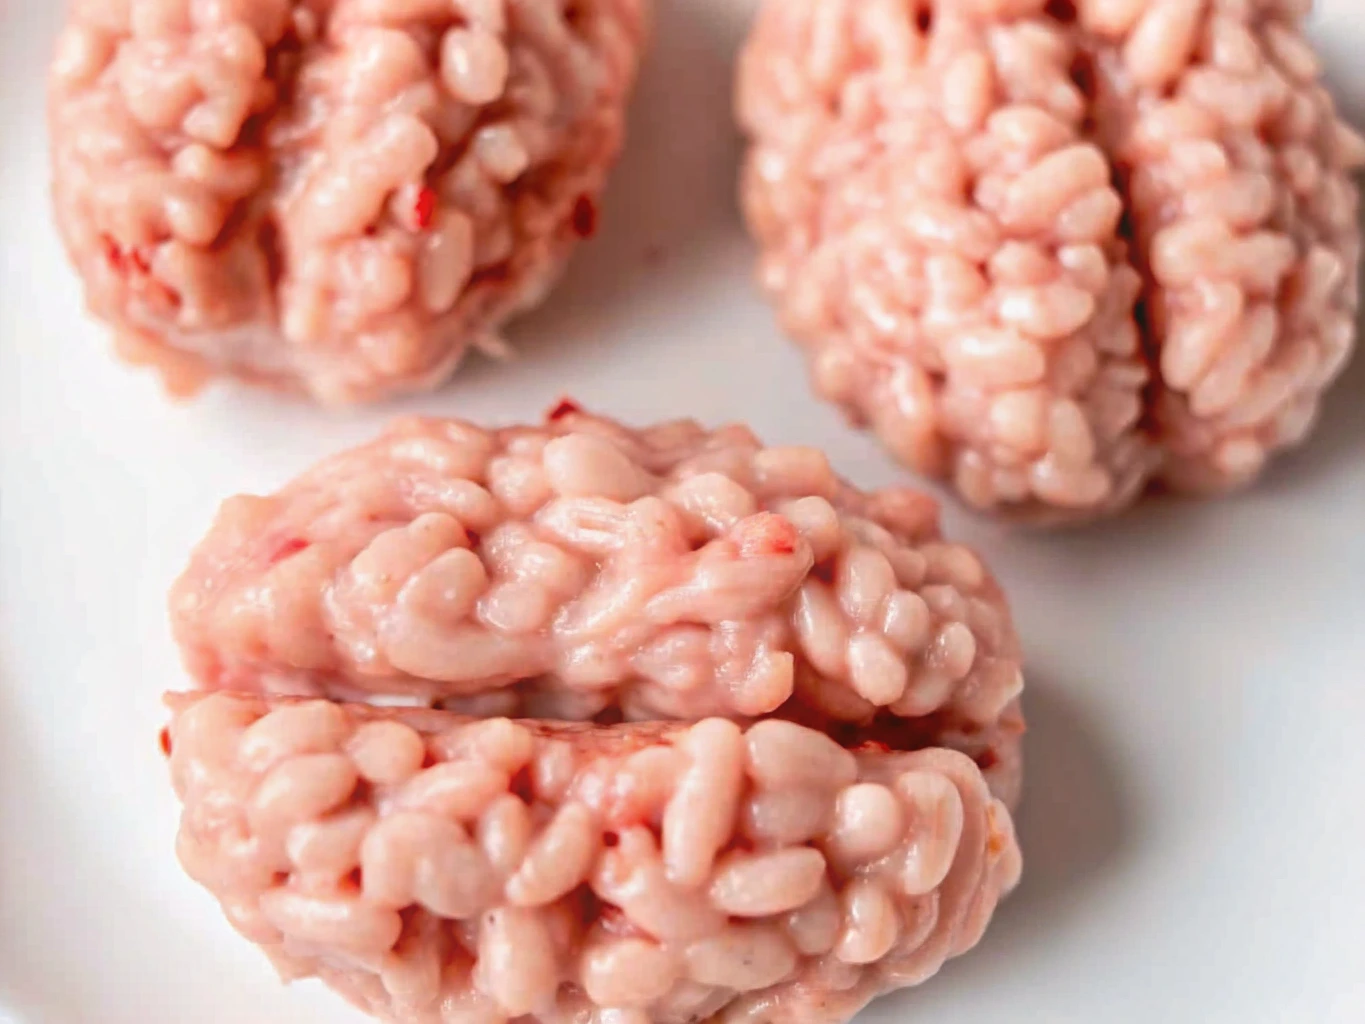
- Brain-shaped silicone molds – These are game-changers! I recommend getting a set of 6-8 individual brain molds for the most realistic look. If you don’t have brain molds, you can shape them by hand, but the molds really make these Rice Krispie treat brains pop!
- Cooking spray or butter for greasing
Can’t find brain molds? No problem! You can hand-shape these treats or use regular muffin tins and sculpt the brain texture with a knife after they’ve set.
How to Make Marshmallow Halloween Brains (Step-by-Step)
Step 1: Prep Your Workspace
Grease everything! I cannot stress this enough – grease your bowl, spatula, and especially those brain molds. This is the secret to getting perfect brains that release easily without breaking.
Step 2: Melt the Base
In a large microwave-safe bowl, combine butter and marshmallows. Microwave in 30-second intervals, stirring between each, until completely melted and smooth. This usually takes 1-2 minutes total.
Stovetop Method: If you prefer, melt over low heat in a heavy-bottomed saucepan, stirring constantly.
Step 3: Add the Gore
Add 8-10 drops of red gel food coloring to your melted marshmallow mixture. Stir until you achieve that perfect “brain blood” color. Don’t worry if it looks a bit pink at first – it’ll darken as it cools!
Step 4: Fold in the Crunch
Remove from heat and immediately fold in the Rice Bubbles. Work quickly but gently – you want every piece coated but don’t want to crush the cereal. The mixture should look like chunky, bloody brain matter (appetizing, right?).
Step 5: Shape Your Brains
Working quickly, press the mixture into your greased brain molds. Don’t press too hard – you want to maintain that bumpy, brain-like texture. If hand-shaping, form into oval brain shapes and use your fingers to create the characteristic grooves.
Step 6: The Big Reveal
Let cool for 15-20 minutes before carefully removing from molds. If they stick, pop them in the fridge for 10 minutes – the cold will help them release.
Tips for the Perfect Gory Brains
The Grease is Key
Seriously, grease everything! Your bowl, spatula, and especially those brain molds. This is hands-down the most important tip for success.
Don’t Overcook the Marshmallows
Melt marshmallows on low heat and remove them as soon as they’re just melted. Overheating makes the final treats hard instead of chewy. You want that perfect gooey brain texture!
The Blood Drizzle Technique
For an extra gory effect, mix a tiny bit of red food coloring with corn syrup and drizzle it over the finished brains. This creates a fresh, bloody look that’ll make your guests squirm (in the best way).
Temperature Matters
Work quickly once you add the Rice Bubbles. The mixture firms up fast as it cools, making it harder to shape.
Fun Variations
Zombie Brains
Add a few drops of green or black food coloring along with the red for a decaying zombie look. Perfect for Walking Dead fans!
Flavor Boost Options
- Add 1/2 teaspoon vanilla extract for classic flavor
- Try strawberry extract for a fruity twist
- Mix in mini chocolate chips for “brain tumors” (morbid but delicious!)
Size Variations
- Make mini brains using small molds for bite-sized treats
- Create one giant brain using a large brain-shaped cake mold
Frequently Asked Questions
Can I make these without a brain mold?
Absolutely! While brain molds create the most realistic look, you can hand-shape these treats. Form them into oval shapes and use your fingers or a knife to create brain-like grooves and texture.
How do I store leftover brains?
Store in an airtight container at room temperature for up to one week. For longer storage, freeze for up to 3 months. Just let them thaw at room temperature before serving.
Can I make these ahead of time?
Yes! These Marshmallow Rice Bubbles Halloween Brains actually taste better after sitting for a day. The flavors meld together beautifully. Make them up to 3 days in advance.
Why are my treats hard instead of chewy?
This usually happens when the marshmallows are overheated. Keep your heat low and remove from heat as soon as they’re melted. Also, make sure you’re using fresh marshmallows.
Can I use regular liquid food coloring?
While gel coloring works best, you can use liquid in a pinch. Just use it sparingly as too much liquid can make your mixture soggy.
Storage and Serving Tips
These gruesome delights keep well at room temperature for up to a week when stored properly. For parties, arrange them on a dark platter with dry ice (safely contained) for an extra spooky presentation.
Pro serving tip: Place them on individual small plates with plastic “blood” dripping down the sides. Your guests will be both horrified and impressed!
Final Thoughts
These Rice Krispie treat brains prove that the best Halloween treats don’t have to be complicated. With just four ingredients and a little creativity, you’ve got a show-stopping dessert that’s guaranteed to be the hit of any Halloween gathering.
The beauty of this recipe lies in its simplicity and the shock value of the final result. Kids love helping make them (and getting their hands messy), while adults appreciate how easy they are to whip up for last-minute party invitations.
So go ahead, embrace your inner mad scientist and create some deliciously disgusting brains that’ll have everyone talking long after Halloween is over!
Print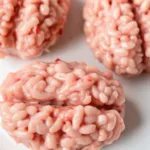
Marshmallow Rice Bubbles Halloween Brains
- Total Time: 15 minutes
- Yield: 10 brains
- Diet: Vegetarian
Description
Spooky, squishy, and sweet, these Marshmallow Rice Bubbles Halloween Brains are a gory-good treat perfect for Halloween parties or trick-or-treat snacks.
Ingredients
6 cups Rice Bubbles (or Rice Krispies) – Both names work perfectly for this Halloween rice bubble recipe! Fresh cereal gives the best crunch.
4 cups mini marshmallows – Use fresh marshmallows for the best gooey texture. Older marshmallows can be dry and won’t melt as smoothly.
3 tablespoons unsalted butter – Unsalted butter lets you control the flavor and prevents the treats from becoming too salty.
Red gel food coloring – Pro-Tip: Use gel-based food coloring instead of liquid. It provides a vibrant red without adding extra liquid to the mixture, keeping your brains perfectly textured.
Instructions
1. Grease everything! Grease your bowl, spatula, and especially the brain molds to ensure easy release of the shaped treats.
2. In a large microwave-safe bowl, combine butter and marshmallows. Microwave in 30-second intervals, stirring between each, until completely melted and smooth. This usually takes 1-2 minutes.
3. (Optional) For stovetop method, melt butter and marshmallows over low heat in a heavy-bottomed saucepan, stirring constantly until smooth.
4. Add 8-10 drops of red gel food coloring to the melted marshmallow mixture. Stir until fully combined and the color resembles “brain blood”.
5. Remove from heat and fold in the Rice Bubbles. Work quickly and gently to coat evenly without crushing the cereal.
6. Press the mixture into greased brain molds. Don’t press too hard—maintain a bumpy, brain-like texture. If shaping by hand, form ovals and use fingers to indent grooves.
7. Let the brains cool for 15-20 minutes before removing from molds. If they stick, chill in the fridge for 10 minutes to help them release.
Notes
These Halloween brains are best enjoyed the same day but can be stored in an airtight container for up to 3 days.
Want to up the gore? Drizzle with red icing or raspberry sauce for a truly terrifying finish.
Use gloves when handling the mixture if you want to avoid red-stained hands!
- Prep Time: 10 minutes
- Cook Time: 5 minutes
- Category: Dessert
- Method: No-Bake
- Cuisine: American