
Forget complicated Halloween treats! These adorable Halloween Peanut Spider Cookies are the only recipe you’ll need this year.
I’ve made these peanut butter spider cookies for my kids’ school parties for years, and I’ve perfected every little trick to make sure they come out perfectly every single time. In this guide, you’ll get a simple, step-by-step spider cookies recipe plus pro tips and fun variations.
Why This Recipe is the BEST
No-Fail Cookie Base: Perfectly soft and chewy, guaranteed not to spread too much.
Super Kid-Friendly: We’ll show you the best steps for little hands to help with.
So Much Better Than Store-Bought: The perfect blend of salty peanut butter and rich chocolate.
Detailed Pro Tips: We’ll cover everything from melting chocolate to storing your spiders.
Customizable: Easy variations for dietary restrictions and flavor preferences.
Ingredients & Equipment
What You’ll Need
For the Cookie Base:
- 1 cup (226g) unsalted butter, softened
- 1 cup (200g) granulated sugar
- 1 cup (220g) packed light brown sugar
- 1 cup (250g) creamy peanut butter
- 2 large eggs
- 2 teaspoons vanilla extract
- 3 cups (375g) all-purpose flour
- 2 teaspoons baking soda
- 1/4 teaspoon salt
For the Spider Decoration:
- 48 miniature peanut butter cups or chocolate truffles
- 1 1/2 cups (255g) chocolate melting wafers
- 96 candy eyes (2 per cookie)
Ingredient Notes (The Secret to Success!)
Peanut Butter: Use a classic creamy peanut butter like Jif or Skippy. Natural peanut butters that separate can make the dough oily and affect the texture. You want that perfectly balanced, slightly salty flavor that comes from traditional brands.
Chocolate: I recommend using chocolate melting wafers (like Ghirardelli or Candiquik) over chocolate chips. They melt smoother and set harder, which is key for the spider’s body and legs. Chocolate chips contain stabilizers that prevent smooth melting.
Candy Eyes: You can find edible candy eyes at craft stores, grocery stores during Halloween season, or online. Wilton makes great ones that stay in place beautifully.
Peanut Butter Cups: Miniature Reese’s cups work perfectly, but you can also use chocolate-covered peanut butter balls or even chocolate truffles for a fancier look.
Equipment You’ll Need
- Stand mixer or hand mixer
- Large mixing bowls
- Baking sheets (2-3)
- Parchment paper or silicone baking mats
- Cookie scoop (1.5 tablespoon size)
- Small microwave-safe bowl for melting chocolate
- Piping bag or small zip-top bag
- Cooling rack
How to Make Halloween Peanut Spider Cookies
Step 1: Prepare Your Workspace
Preheat your oven to 375°F (190°C). Line your baking sheets with parchment paper. This prevents sticking and makes cleanup a breeze.
Step 2: Cream the Butter and Sugars
In a large bowl, cream together the softened butter, granulated sugar, and brown sugar until light and fluffy—about 3 minutes. This incorporates air and creates that perfect chewy texture.
Step 3: Add Wet Ingredients
Beat in the peanut butter until fully combined. Then add the eggs one at a time, followed by the vanilla extract. Mix until everything is smooth and creamy.
Step 4: Combine Dry Ingredients
In a separate bowl, whisk together the flour, baking soda, and salt. Gradually add the dry ingredients to the wet mixture, mixing on low speed until just combined. Don’t overmix!
Step 5: Chill the Dough
Here’s my secret weapon: Chill the dough for at least 30 minutes. This prevents excessive spreading and helps the cookies maintain their shape with that perfect thumbprint center.
Step 6: Shape and Bake
Roll the dough into 1.5-tablespoon sized balls and place them 2 inches apart on your prepared baking sheets. Using your thumb or the back of a teaspoon, make an indentation in the center of each cookie.
Bake for 10-12 minutes until the edges are lightly golden. The centers may look slightly underdone—that’s perfect! They’ll continue cooking on the hot pan.
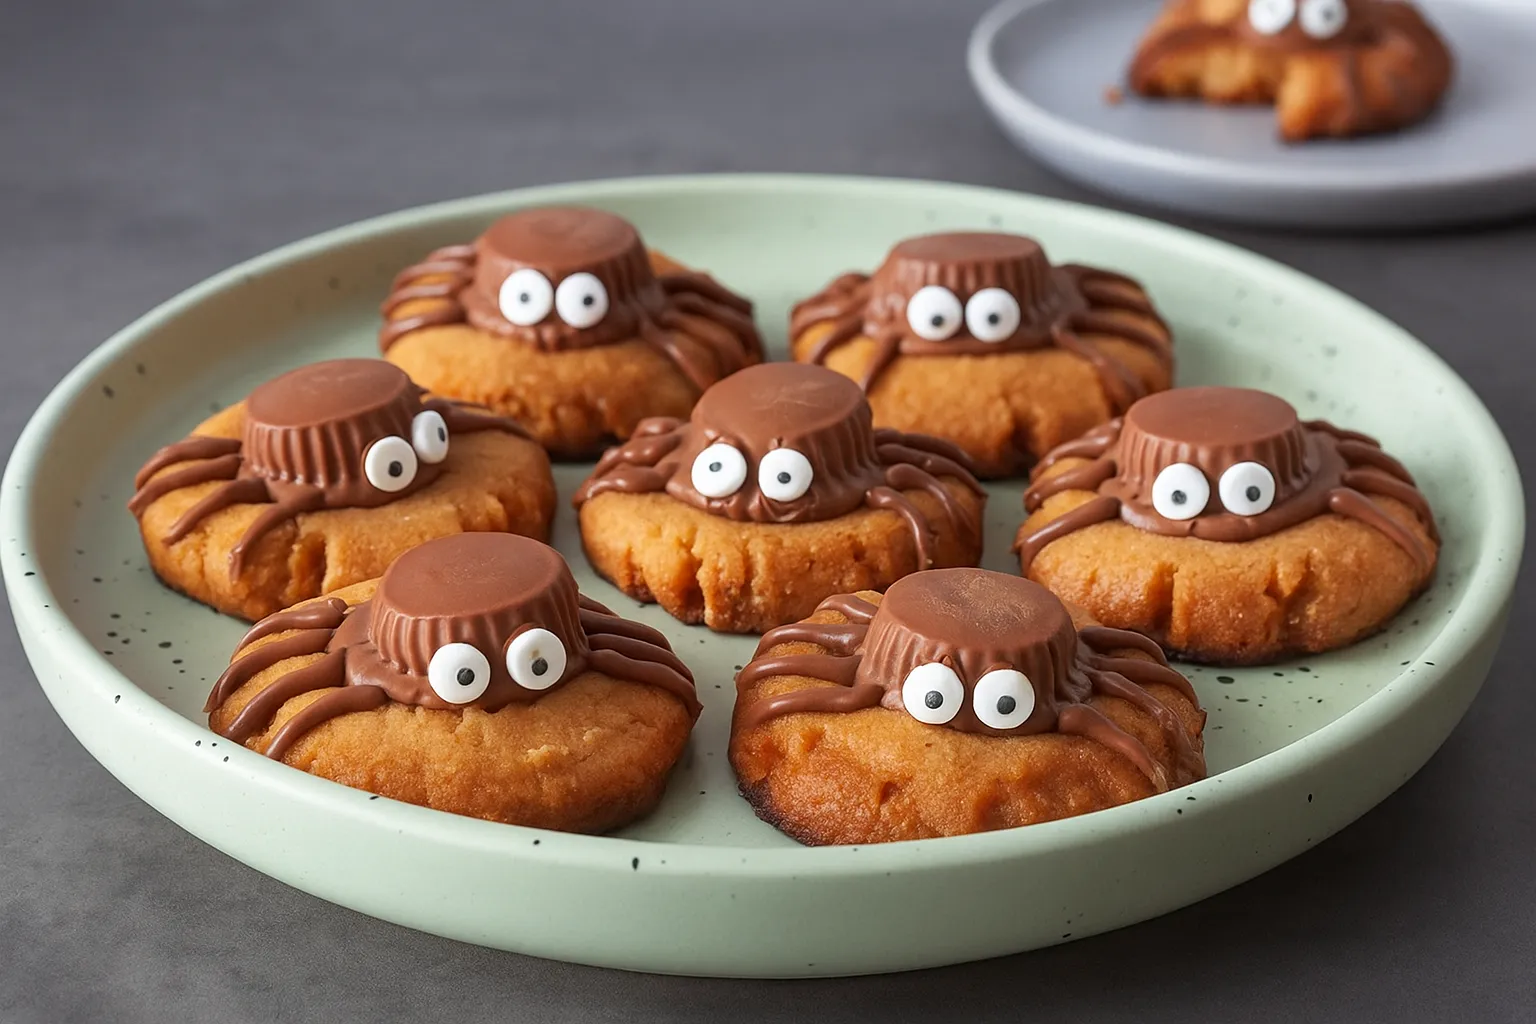
Step 7: Add the Spider Bodies
Immediately after removing cookies from the oven, gently press a peanut butter cup into the center of each cookie while they’re still warm. The residual heat will help them stick perfectly. Let cookies cool completely on the baking sheet.
Step 8: Melt the Chocolate
Place your chocolate melting wafers in a microwave-safe bowl. Microwave in 30-second intervals, stirring between each, until smooth and completely melted. This should take 60-90 seconds total.
Step 9: Pipe the Spider Legs
Transfer the melted chocolate to a piping bag or zip-top bag with a small corner snipped off. Pipe 8 legs (4 on each side) extending from the peanut butter cup body. Make them slightly curved for a realistic spider look.
Step 10: Add the Eyes
While the chocolate is still slightly wet, place 2 candy eyes on top of the peanut butter cup. Press gently so they adhere. Let the chocolate set completely—about 15 minutes at room temperature, or 5 minutes in the refrigerator.
Pro Tips for Perfect Spider Cookie
How to Keep Cookies from Spreading
The secret is chilling your dough! I recommend at least 30 minutes in the refrigerator before baking. This solidifies the butter, which means cookies hold their shape better in the oven. If your kitchen is particularly warm, chill for up to an hour.
The Best Way to Melt Chocolate
While the microwave works in a pinch, use a double boiler for a smooth, glossy finish that won’t seize. Place a heat-safe bowl over a pot of simmering water (not touching the water), add your chocolate, and stir until melted. This gentle heat prevents burning and creates the perfect consistency.
Piping Perfect Spider Legs
Don’t have a piping bag? No problem! The zip-top bag trick works perfectly. Fill the bag with melted chocolate, seal it, and snip off a tiny corner—start small, you can always cut more. Hold the bag at a 45-degree angle and apply steady, even pressure. For beginners, practice on parchment paper first.
Getting the Candy Eyes to Stick
The trick is to add them while the chocolate body is still wet, but not too hot. If the chocolate is too warm, the eyes will slide off. Wait about 30 seconds after piping the legs, then add the eyes with a gentle press. They’ll stay put as the chocolate sets.
Achieving Uniform Cookies
Use a cookie scoop! This ensures every cookie is the same size, which means they’ll bake evenly. Plus, it’s way faster than rolling by hand and much less messy.
Variations & Substitutions
Peanut-Free Spider Cookies
Have a nut allergy? Use a sunflower seed butter (like SunButter) in place of peanut butter and swap the peanut butter cups for chocolate-caramel candies (like Rolos) or mini chocolate truffles. The flavor is slightly different but equally delicious!
Gluten-Free Option
Simply substitute the all-purpose flour with a high-quality 1-to-1 gluten-free baking flour like Bob’s Red Mill or King Arthur. No other adjustments needed! The texture is virtually identical.
Cookie Base Variations
Not a peanut butter fan? You can use this same decorating technique on a classic chocolate chip cookie or snickerdoodle base! The spider decorations work beautifully on any thumbprint-style cookie.
Different Spider Bodies
Get creative with the center! Try mini Oreos, chocolate-covered marshmallows, malted milk balls, or even Ferrero Rocher candies for an elegant twist.
Storage & Make-Ahead Instructions
Storing Your Spider Cookies
Store in a single layer in an airtight container at room temperature for up to 5 days. Stacking them can break the delicate chocolate legs, so if you must stack, place parchment paper between layers.
Freezing Instructions
You can freeze the baked cookies before decorating for up to 3 months. Let them thaw completely at room temperature, then add the chocolate body and legs. You can also freeze the finished decorated cookies, but be aware the legs may become fragile. Thaw in a single layer.
Make-Ahead Dough
The cookie dough can be made up to 3 days in advance and stored in the refrigerator. You can also freeze the dough balls for up to 2 months. Bake from frozen, adding 1-2 extra minutes to the baking time.
Frequently Asked Questions
Can I make the cookie dough ahead of time?
Absolutely! The dough actually benefits from an overnight rest in the refrigerator. The flavors meld together beautifully, and chilled dough is even easier to work with. Just let it sit at room temperature for 10 minutes before scooping if it’s too firm.
What candy works best for the spider’s body?
Miniature peanut butter cups are traditional and delicious, but you have options! Chocolate truffles create an elegant look, Rolos work for nut-free versions, and even chocolate-covered cherries make fun “spider bodies.” Choose based on your preference and dietary needs.
My chocolate seized! What did I do wrong?
Chocolate seizes when it comes into contact with water or steam, or when it’s overheated. Make sure your bowl is completely dry, melt slowly at low power, and stir frequently. If it does seize, you can sometimes save it by stirring in a teaspoon of vegetable oil or shortening.
How do I get my kids involved in making these?
Kids love these! Let them help with: scooping the cookie dough balls, making the thumbprint indentations, pressing in the peanut butter cups after baking, and placing the candy eyes. Save the chocolate melting and piping for adults or older kids with supervision.
Can I use chocolate chips instead of melting wafers?
You can, but the results won’t be as smooth. Chocolate chips contain stabilizers that prevent them from melting smoothly. If you must use chips, add 1 teaspoon of coconut oil or shortening per cup of chips to help them melt better.
How far in advance can I make these for a party?
These peanut butter spider cookies can be made up to 3 days before your event. Store them properly in a single layer, and they’ll stay fresh and delicious. The chocolate sets firmly, so they’re great for transporting to parties too.
Print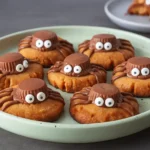
Halloween Peanut Spider Cookies
- Total Time: 1 hour
- Yield: 48 cookies
- Diet: Vegetarian
Description
Fun and spooky Halloween cookies made with a peanut butter base, topped with peanut butter cups, chocolate spider legs, and candy eyes for a festive treat.
Ingredients
1 cup (226g) unsalted butter, softened
1 cup (200g) granulated sugar
1 cup (220g) packed light brown sugar
1 cup (250g) creamy peanut butter
2 large eggs
2 teaspoons vanilla extract
3 cups (375g) all-purpose flour
2 teaspoons baking soda
1/4 teaspoon salt
48 miniature peanut butter cups or chocolate truffles
1 1/2 cups (255g) chocolate melting wafers
96 candy eyes (2 per cookie)
Instructions
1. Preheat oven to 375°F (190°C) and line baking sheets with parchment paper.
2. Cream butter, granulated sugar, and brown sugar until light and fluffy, about 3 minutes.
3. Beat in peanut butter, then add eggs one at a time, followed by vanilla extract.
4. In a separate bowl, whisk together flour, baking soda, and salt. Gradually mix into wet ingredients until just combined.
5. Chill dough for at least 30 minutes to prevent spreading.
6. Roll dough into 1.5-tbsp balls, place on baking sheets, and press a thumbprint indentation in the center of each.
7. Bake 10–12 minutes until edges are lightly golden. Remove from oven and press a peanut butter cup into each center. Cool completely.
8. Melt chocolate wafers in the microwave in 30-second intervals until smooth.
9. Pipe 8 spider legs (4 per side) from each peanut butter cup using a piping bag.
10. Attach 2 candy eyes to each spider body while chocolate is still wet. Let set before serving.
Notes
Use classic creamy peanut butter like Jif or Skippy for the best texture—natural peanut butters may make the dough oily.
Always chill the dough before baking to help cookies keep their shape.
Melting wafers, not chocolate chips, give smooth, sturdy spider legs.
Candy eyes can be found at craft stores or online and make these cookies come alive!
- Prep Time: 30 minutes
- Cook Time: 12 minutes
- Category: Dessert
- Method: Baked
- Cuisine: American