
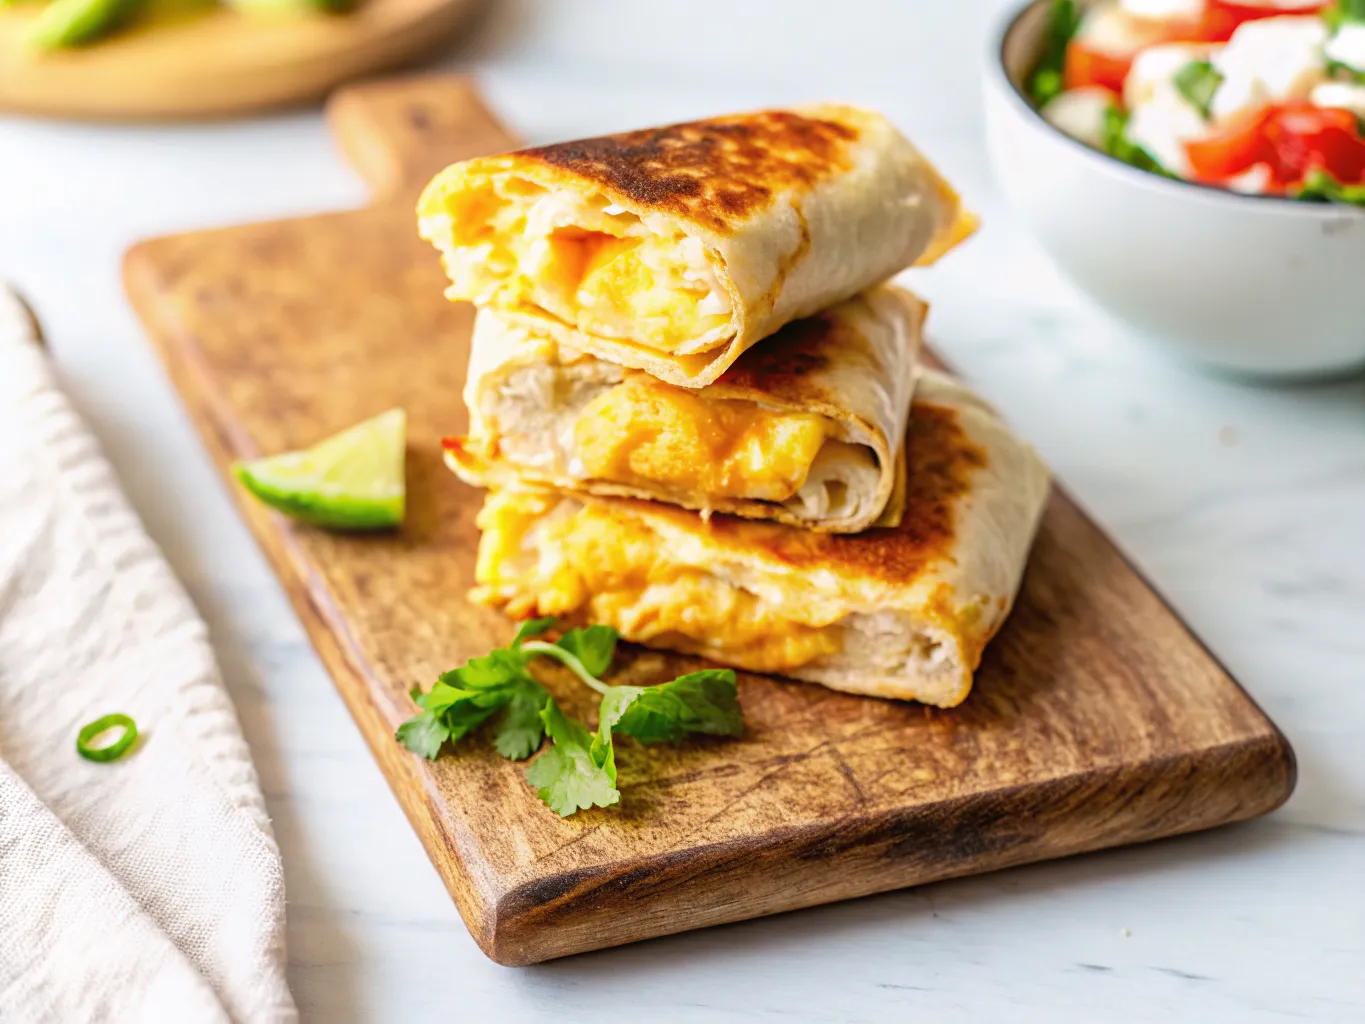
Looking for a weeknight dinner that disappears from the plate? These Cheesy Garlic Chicken Wraps are your new go-to. They’re quick, packed with flavor, and loved by kids and adults alike. Trust me, once you try this recipe, you’ll be making these golden, crispy wraps on repeat!
Why This Cheesy Garlic Chicken Wrap Recipe is the Only One You’ll Ever Need
I’ve tested dozens of chicken wrap recipes, and this one consistently delivers restaurant-quality results at home. Here’s what makes these garlic chicken wraps absolutely irresistible:
- Incredibly Fast: From prep to plate in just 20 minutes – perfect for busy weeknights
- Simple, Pantry-Friendly Ingredients: No fancy shopping trips needed; you probably have most ingredients already
- Perfectly Melted Cheese: My foolproof method guarantees that perfect cheese-pull every single time
- Meal-Prep Champion: Make-ahead instructions for easy lunches and dinners all week long
- Kid-Approved: Even picky eaters devour these without complaint
The secret? It’s all in the technique. Most people either undercook the tortilla (leaving it soggy) or overcook it (making it tough). My method creates that perfect golden-brown exterior with a warm, gooey center that’ll have everyone asking for seconds.
Ingredients & Substitutions
For the Chicken & Marinade:
- 1 lb boneless, skinless chicken breasts, cut into bite-sized pieces
- 2 tablespoons olive oil
- 2 teaspoons garlic powder
- 1 teaspoon onion powder
- 1 teaspoon paprika
- 1/2 teaspoon salt
- 1/4 teaspoon black pepper
For the Wraps & Filling:
- 4 large flour tortillas (burrito-size)
- 2 cups shredded cheese blend (mozzarella and cheddar)
- 2 tablespoons fresh garlic, minced
- 2 tablespoons butter
- Optional: fresh parsley for garnish
Ingredient Notes & Easy Swaps
Chicken: Rotisserie chicken works fantastic here – just shred about 3 cups and skip the cooking step. Chicken thighs also work great and stay extra juicy.
Tortillas: Large “burrito-size” flour tortillas work best for wrapping, but you can substitute with whole wheat or low-carb tortillas. Just make sure they’re pliable!
Cheese: A blend of mozzarella (for that amazing melt) and sharp cheddar (for flavor) is my go-to combination. Provolone, Monterey Jack, or even pepper jack for heat are excellent alternatives.
Step-by-Step Instructions
1. Prep the Chicken
Season your chicken pieces with olive oil, garlic powder, onion powder, paprika, salt, and pepper. Toss everything together until the chicken is evenly coated.
2. Cook the Chicken
Heat a large skillet over medium-high heat. Add the seasoned chicken and cook for 6-8 minutes, stirring occasionally, until golden brown and cooked through (internal temperature of 165°F). Remove from heat and set aside.
3. Assemble the Wrap
Lay your tortilla flat and sprinkle 1/4 cup of cheese down the center. Add about 1/4 of the cooked chicken, then top with another 1/4 cup of cheese. Don’t overstuff – this is crucial for a wrap that won’t burst!
4. Fold it Up
Fold the sides of the tortilla over the filling, then roll tightly from the bottom up, creating a secure burrito-style wrap. The key is to keep it snug but not so tight that it tears.
5. Toast to Perfection
In the same skillet, melt a pat of butter with minced fresh garlic over medium heat. Place the wrap seam-side down and cook for 2-3 minutes until golden brown. Flip and cook another 2-3 minutes. The tortilla should be crispy and the cheese completely melted.
Pro-Tips for the Perfect Wrap
After making hundreds of these cheesy chicken wraps, here are my insider secrets:
Don’t Overstuff: Less is more when it comes to filling. An overstuffed wrap tears easily and becomes impossible to eat neatly.
Shred Your Own Cheese: Pre-shredded cheese has anti-caking agents that prevent smooth melting. Freshly shredded cheese creates that Instagram-worthy cheese pull!
Get a Good Sear: Always toast the wrap seam-side down first. This seals the wrap shut and prevents it from unrolling.
Rest for a Minute: Let the finished wrap rest for 60 seconds before slicing. This helps the cheese set slightly and keeps all the filling inside when you cut it.
Control Your Heat: Medium heat is perfect. Too high and the outside burns before the cheese melts; too low and you won’t get that crispy exterior.
Fun Variations to Try
Spicy Garlic Chicken Wraps
Add 1/2 teaspoon of red pepper flakes to the chicken seasoning and a dash of your favorite hot sauce. The heat pairs beautifully with the creamy melted cheese.
Low-Carb / Keto Version
Use your favorite low-carb tortillas and serve with a crisp side salad instead of chips. You can also make these lettuce-wrapped for an ultra-low-carb option.
Air Fryer Method
Assemble as directed, then air fry at 375°F (190°C) for 5-7 minutes, flipping halfway through, until golden and crisp. This method gives you an even crispier exterior!
What to Serve with Your Wraps
These Cheesy Garlic Chicken Wraps are satisfying on their own, but they’re even better with the right accompaniments:
- Crisp Green Salad: A simple mixed greens salad with vinaigrette cuts through the richness
- Sweet Potato Fries: The sweetness complements the savory garlic flavors perfectly
- Tomato Basil Soup: Classic comfort food pairing that’s especially cozy in winter
- Guacamole and Sour Cream: Perfect for dipping or adding extra creaminess
- Pickled Jalapeños: Add a tangy kick that balances the cheese
Storage, Freezing, and Meal Prep
Storing
Store leftover wraps in an airtight container in the refrigerator for up to 3 days. Keep them whole to maintain freshness.
Reheating
For best results, reheat in a skillet over medium heat for 2-3 minutes per side, or use an air fryer at 350°F for 3-4 minutes. This keeps the tortilla crisp rather than soggy like the microwave does.
Meal Prep
Cook the garlic chicken filling ahead of time and store in the refrigerator for up to 4 days. When ready to eat, simply assemble the wraps and toast for a 5-minute meal that tastes freshly made.
Freezing (Untoasted)
Assemble the wraps but don’t toast them. Wrap each one individually in plastic wrap, then place in a freezer bag. Freeze for up to 3 months. To use, thaw overnight in the refrigerator and toast as directed.
Frequently Asked Questions (FAQ)
Q: Can I use pre-cooked chicken? A: Absolutely! Rotissery chicken is a fantastic time-saver. Just shred about 3 cups and warm it with the garlic and seasonings for extra flavor.
Q: How do I keep my wraps from getting soggy? A: Toasting is key! Also ensure your chicken isn’t too wet when you add it to the wrap. Pat it dry if necessary.
Q: What’s the best way to fold a wrap so it doesn’t fall apart? A: Always fold the sides in first, then roll from the bottom up. Keep the roll tight but not so tight that it tears the tortilla.
Q: Can I make these ahead for a party? A: Yes! Assemble the wraps, toast them, then slice into pinwheels. They make excellent appetizers and can be made up to 2 hours ahead.
Q: My cheese isn’t melting properly. What am I doing wrong? A: Make sure your skillet isn’t too hot, and cover the wrap with a lid for the last minute of cooking to trap heat and help the cheese melt completely.
Print
Cheesy Garlic Chicken Wraps
- Total Time: 30 minutes
- Yield: 4 wraps
Description
Crispy, golden wraps stuffed with juicy garlic-seasoned chicken and gooey melted cheese, toasted in a buttery garlic finish.
Ingredients
For the Chicken & Marinade:
1 lb boneless, skinless chicken breasts, cut into bite-sized pieces
2 tablespoons olive oil
2 teaspoons garlic powder
1 teaspoon onion powder
1 teaspoon paprika
1/2 teaspoon salt
1/4 teaspoon black pepper
For the Wraps & Filling:
4 large flour tortillas (burrito-size)
2 cups shredded cheese blend (mozzarella and cheddar)
2 tablespoons fresh garlic, minced
2 tablespoons butter
Optional: fresh parsley for garnish
Instructions
1. Season your chicken pieces with olive oil, garlic powder, onion powder, paprika, salt, and pepper. Toss everything together until evenly coated.
2. Heat a large skillet over medium-high heat. Add the seasoned chicken and cook for 6-8 minutes, stirring occasionally, until golden brown and cooked through (165°F). Remove from heat and set aside.
3. Lay a tortilla flat and sprinkle 1/4 cup of cheese down the center. Add about 1/4 of the cooked chicken, then top with another 1/4 cup of cheese.
4. Fold the sides of the tortilla over the filling, then roll tightly from the bottom up into a secure burrito-style wrap.
5. In the same skillet, melt butter with minced fresh garlic over medium heat. Place the wrap seam-side down and cook 2-3 minutes until golden. Flip and cook another 2-3 minutes until crispy and the cheese is melted.
Notes
Chicken: Rotisserie chicken works fantastic – just shred about 3 cups and skip the cooking step. Chicken thighs also stay extra juicy.
Tortillas: Burrito-size flour tortillas work best, but whole wheat or low-carb tortillas also work. Make sure they’re pliable!
Cheese: A mozzarella-cheddar blend is ideal, but provolone, Monterey Jack, or pepper jack are excellent swaps.
- Prep Time: 15 minutes
- Cook Time: 15 minutes
- Category: Main Course
- Method: Stovetop
- Cuisine: American