
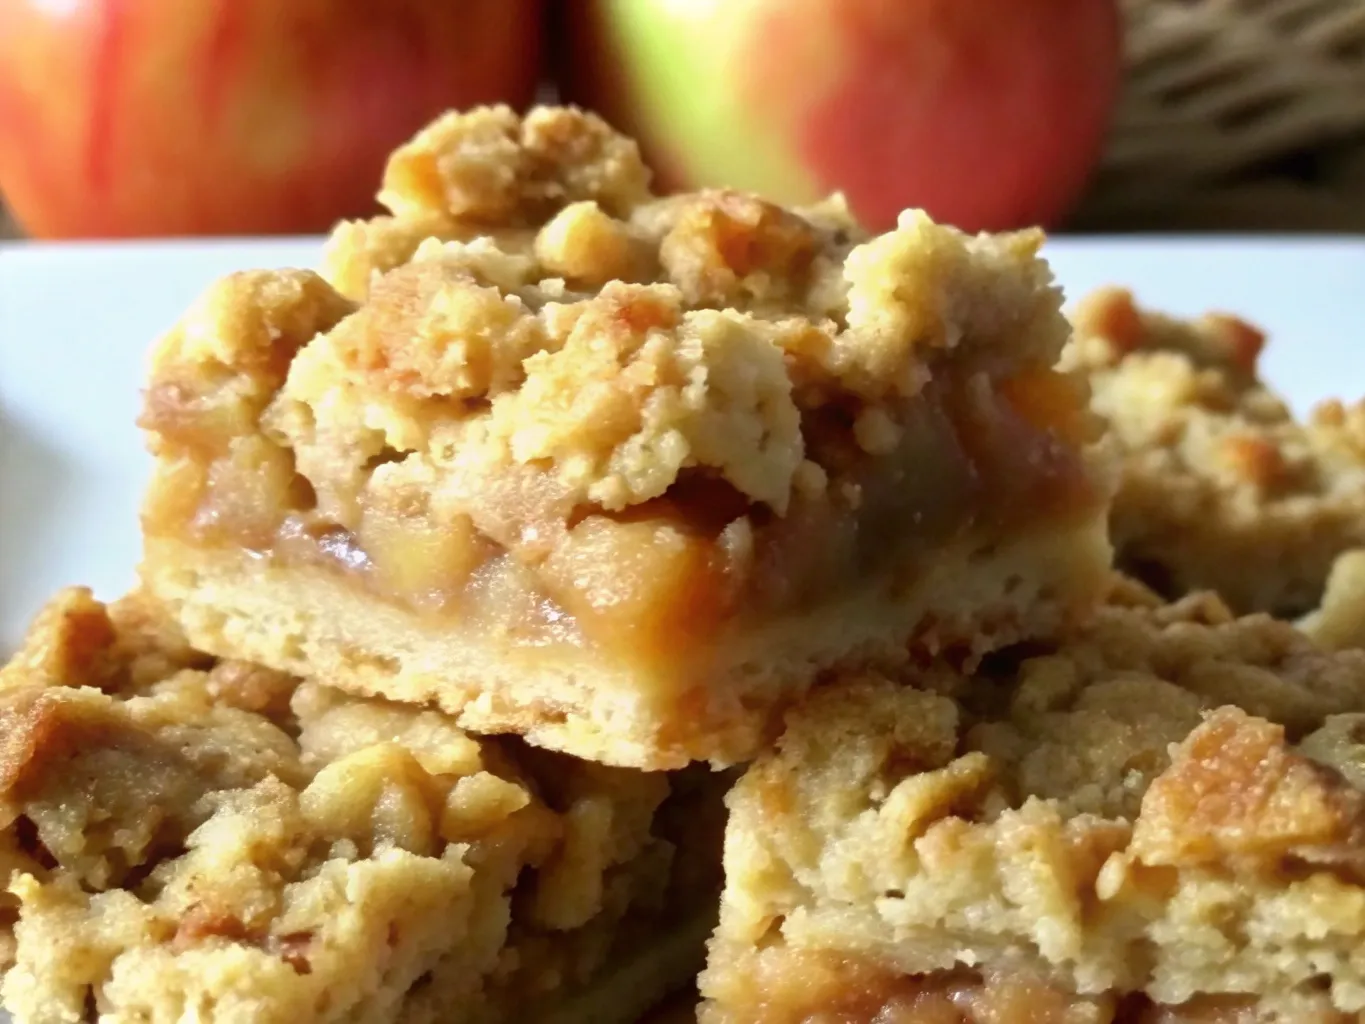
These Apple Pie Bars combine buttery shortbread crust, spiced apple filling, and crumbly topping in perfect harmony. I’ve tested this recipe dozens of times to create foolproof bars that work for beginners and experienced bakers alike.
Why This Recipe Works (And Will Become Your Favorite)
Let me tell you why these easy apple pie bars will become your go-to dessert. After years of testing, I’ve cracked the code on what makes truly exceptional apple crumble bars.
The Perfect 3-Layer Ratio: I’ve found the ideal balance between a sturdy shortbread base, generous apple filling, and just enough crumble topping to add texture without overwhelming the fruit. Each bite gives you all three components in perfect harmony.
No Soggy Bottoms: Nothing ruins apple bars like a soggy crust! My secret is partially pre-baking the bottom layer and adding a thin layer of flour to absorb excess moisture from the apples. This technique ensures your crust stays crisp even after the bars cool.
Deep Apple Flavor: Here’s my game-changer: I briefly sauté the apple mixture before layering. This concentrates the flavors and removes excess water that could make your bars mushy. The result? Intensely apple-flavored bars that taste like concentrated autumn.
Beginner Friendly: I’ve included step-by-step photos and detailed instructions that assume you’ve never baked before. No confusing jargon or skipped steps here!
Essential Ingredients & Equipment
Getting the right ingredients makes all the difference. Here’s what you’ll need and why each component matters.
For the Buttery Shortbread Crust & Crumble:
- 2 cups all-purpose flour – Provides structure
- 1 cup cold unsalted butter – Creates those flaky layers we love
- ½ cup brown sugar – Adds moisture and caramel notes
- ¼ cup granulated sugar – Balances sweetness
- ½ teaspoon salt – Enhances all other flavors
Expert Tip: The butter MUST be cold! Cold butter creates steam pockets as it melts, resulting in a flakier, more tender texture. I cut mine into cubes and pop them in the freezer for 10 minutes before using.
For the Spiced Apple Filling:
- 6 large apples, peeled and diced – The star of the show
- ½ cup granulated sugar – Adjust based on apple sweetness
- 2 tablespoons all-purpose flour – Thickens the filling
- 1 teaspoon ground cinnamon – Classic apple spice
- ¼ teaspoon nutmeg – Adds warmth
- 2 tablespoons lemon juice – Prevents browning and adds brightness
The Best Apples for Baking
Not all apples are created equal! Here’s my quick guide:
- Granny Smith: Tart flavor, holds shape well – my top choice
- Honeycrisp: Sweet with good texture, but can get mushy
- Braeburn: Perfect balance of sweet and tart, excellent for baking
Pro tip: Mix two varieties for complex flavor!
Kitchen Equipment You’ll Need:
- 9×13 inch metal baking pan – Metal conducts heat better for crispier edges
- Large mixing bowls – You’ll need at least two
- Pastry cutter or two knives – For cutting butter into flour
- Large skillet – For pre-cooking the apple mixture
Pro-Tip: Metal pans create crispier edges compared to glass pans. If you only have glass, add 5-10 minutes to your baking time.
How to Make Apple Pie Bars: Step-by-Step
Ready to create magic in your kitchen? Let’s break this down into manageable steps that guarantee success.
Step 1: Prepare Your Crust Base
- Preheat your oven to 350°F and line your 9×13 pan with parchment paper.
- In a large bowl, combine 2 cups flour, ½ cup brown sugar, ¼ cup granulated sugar, and ½ teaspoon salt.
- Cut in the cold butter using a pastry cutter until the mixture resembles coarse crumbs with some pea-sized pieces remaining. This texture is crucial – don’t over-mix!
- Reserve 1½ cups of this mixture for your crumble topping. Press the remaining mixture firmly into your prepared pan.
Step 2: Pre-Bake and Prepare Filling
- Bake the crust for 15 minutes until lightly golden.
- Meanwhile, heat a large skillet over medium heat. Add your diced apples, sugar, flour, cinnamon, nutmeg, and lemon juice.
- Cook for 5-7 minutes, stirring frequently, until apples are slightly softened and the mixture has thickened. This step is key for preventing watery bars!
Step 3: Assembly and Final Bake
- Remove the par-baked crust from the oven and immediately spread the warm apple mixture evenly over the surface.
- Sprinkle the reserved crumb mixture over the apples, pressing gently.
- Bake for 25-30 minutes until the top is golden brown and the filling is bubbling around the edges.
A Baker’s Secrets: Tips for No-Fail Results
After making hundreds of batches, here are my insider tips for perfect apple pie bars every single time.
Don’t Overwork the Dough: Once you achieve that coarse crumb texture, stop mixing! Overworked dough creates tough, dense bars instead of tender, flaky ones.
The Cool-Down is Crucial: I know it’s tempting, but resist cutting these bars while they’re warm. They need at least 2 hours to cool completely, allowing the filling to set properly. Warm bars will fall apart and create a mess.
Getting Clean Slices: Use a sharp, thin knife and wipe it clean between each cut. This prevents the crumb topping from pulling away from the bars.
Adjusting Sweetness: Always taste your apples first! Really tart apples might need an extra tablespoon of sugar, while sweet varieties might need slightly less.
Common Problems & Troubleshooting (Our Secret Weapon)
Let me save you from the mistakes I’ve made so you get perfect results on your first try.
“Why is my filling watery?” This usually happens when you skip the pre-cooking step or use apples with high water content. The solution: always sauté your apple mixture briefly to remove excess moisture, and don’t skip the flour in the filling!
“Why is my crust greasy?” Your butter was too warm when you mixed the dough. Next time, make sure your butter is cold and work quickly. If your kitchen is very warm, chill your mixing bowl first.
“My crumble topping isn’t crumbly.” The butter melted instead of staying in small pieces. Keep that butter cold and don’t overmix! If this happens, pop the whole mixture in the fridge for 10 minutes before sprinkling on top.
Variations & Customizations
Once you’ve mastered the basic recipe, try these delicious twists that’ll keep your family guessing!
Salted Caramel Apple Pie Bars: Drizzle cooled bars with homemade caramel sauce and sprinkle with sea salt. The sweet-salty combination is absolutely divine.
Gluten-Free Apple Pie Bars: Substitute the all-purpose flour with a 1-to-1 gluten-free baking blend. I recommend King Arthur’s blend for best results. No other adjustments needed!
Nutty Crumble Topping: Add ½ cup chopped pecans or walnuts to your crumble mixture for extra crunch and nutty flavor. Toast the nuts first for even better taste!
Storing, Freezing, and Make-Ahead Instructions
Planning ahead? Here’s how to keep your apple crumble bars fresh and delicious.
Storing: Keep covered at room temperature for up to 3 days, or refrigerate for up to one week. The bars actually improve after a day as the flavors meld together.
Freezing: These freeze beautifully! Wrap individual bars in plastic wrap and freeze for up to 3 months. You can also freeze the entire pan – just wrap tightly in plastic wrap and aluminum foil.
Make-Ahead: The crumble mixture can be prepared and refrigerated for up to 3 days before using. You can also assemble the entire recipe and refrigerate overnight before baking – just add 5-10 extra minutes to the baking time.
Frequently Asked Questions (FAQ)
Can I use a different size pan? Absolutely! For an 8×8 pan, cut the recipe in half and bake for 20-25 minutes. For a 9×9 pan, use ¾ of the recipe and check for doneness at 25 minutes.
Can I use canned apple pie filling? While fresh is always better, you can use 2 cans of apple pie filling in a pinch. Skip the pre-cooking step and add an extra tablespoon of flour to prevent sogginess.
Do I have to peel the apples? I always peel for the best texture, but you can leave peels on if you prefer. Just dice the apples smaller so the peels aren’t too noticeable.
What can I serve with these bars? These are incredible on their own, but try them with vanilla ice cream, fresh whipped cream, or a drizzle of heavy cream. For special occasions, a scoop of cinnamon ice cream is pure heaven!
Print
Apple Pie Bars
- Total Time: 1 hour 5 minutes
- Yield: 12 bars
- Diet: Vegetarian
Description
These Apple Pie Bars feature a buttery shortbread crust, warmly spiced apple filling, and a crumbly topping for the perfect handheld dessert—just like classic apple pie, but way easier!
Ingredients
For the Buttery Shortbread Crust & Crumble:
2 cups all-purpose flour – Provides structure
1 cup cold unsalted butter – Creates those flaky layers we love
½ cup brown sugar – Adds moisture and caramel notes
¼ cup granulated sugar – Balances sweetness
½ teaspoon salt – Enhances all other flavors
For the Spiced Apple Filling:
6 large apples, peeled and diced – The star of the show
½ cup granulated sugar – Adjust based on apple sweetness
2 tablespoons all-purpose flour – Thickens the filling
1 teaspoon ground cinnamon – Classic apple spice
¼ teaspoon nutmeg – Adds warmth
2 tablespoons lemon juice – Prevents browning and adds brightness
Instructions
1. Preheat your oven to 350°F and line your 9×13 pan with parchment paper.
2. In a large bowl, combine 2 cups flour, ½ cup brown sugar, ¼ cup granulated sugar, and ½ teaspoon salt.
3. Cut in the cold butter using a pastry cutter until the mixture resembles coarse crumbs with some pea-sized pieces remaining. Don’t over-mix.
4. Reserve 1½ cups of this mixture for your crumble topping. Press the remaining mixture firmly into your prepared pan.
5. Bake the crust for 15 minutes until lightly golden.
6. Meanwhile, heat a large skillet over medium heat. Add diced apples, sugar, flour, cinnamon, nutmeg, and lemon juice.
7. Cook for 5–7 minutes, stirring frequently, until apples are slightly softened and the mixture has thickened.
8. Remove the par-baked crust from the oven and spread the warm apple mixture evenly over the surface.
9. Sprinkle the reserved crumb mixture over the apples, pressing gently.
10. Bake for 25–30 minutes until the top is golden brown and the filling is bubbling around the edges.
Notes
Expert Tip: The butter MUST be cold! Cold butter creates steam pockets as it melts, resulting in a flakier, more tender texture. Cut into cubes and freeze for 10 minutes before using.
Apple Variety Tips:
– Granny Smith: Tart, holds shape well – top choice
– Honeycrisp: Sweet with good texture, but softens easily
– Braeburn: Balanced flavor and bakes beautifully
Try mixing varieties for complex flavor!
Pro-Tip: Use a metal pan for crispier edges. If using glass, increase bake time by 5–10 minutes.
- Prep Time: 20 minutes
- Cook Time: 45 minutes
- Category: Dessert
- Method: Baking
- Cuisine: American